Ever noticed those Google search results that are marked with a little lightning box? This indicates that they use Google’s AMP standard. AMP stands for Accelerated Mobile Pages, and its standard is designed to make pages load really fast on mobile devices. But this drastic increase in speed is a result of a few changes on how the open internet works. Here’s how Google’s AMP project works: Instead of being directed to a website, a visitor using the search engine instead gets taken to a copy of the website on Google’s servers. This, however, only happens when browsing from a mobile device and only for sites that have agreed to participate in the AMP project.
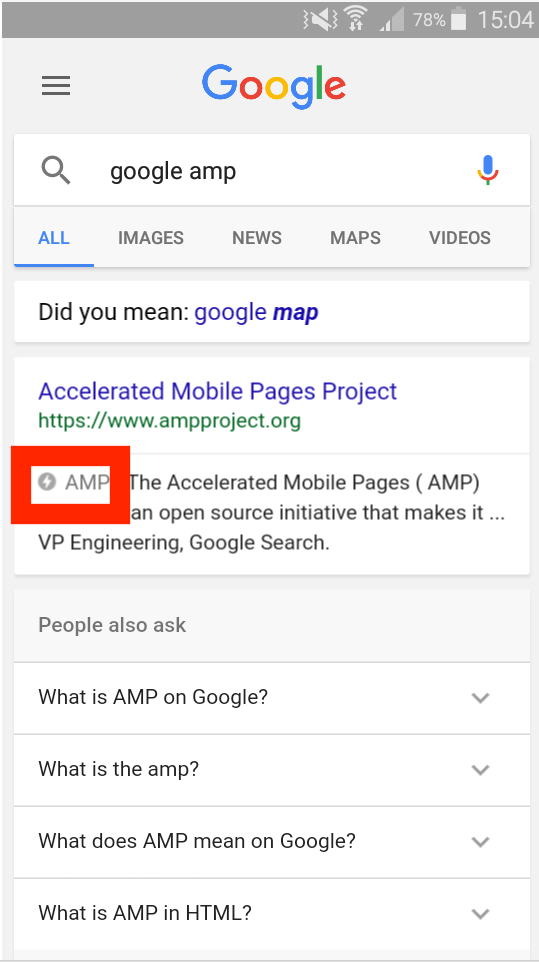
Google’s reason for implementing AMP is to deliver the best possible browsing experience to its mobile users. They want to the end user to get information as fast as possible, without having to wait to read or see something.
1. Why Use AMP on Your WordPress Site?
When loading a typical web page, your browser does a lot of things. It first loads the HTML page, which provides it with a list of other resources to load. In many cases it includes CSS to make everything look pretty, fonts, a few images, and JavaScript to track page stats and serve ads. Loading each of these resources takes time; it may only be a few milliseconds for each, but it adds up.
To speed things up, Google AMP creates a separate version of each page on your website, limited to the most basic (therefore fastest) web technologies. All the webpages are hosted on Google’s servers which speeds things up even more. Google AMP uses only a limited set of JavaScript and CSS, so you can’t add certain features and widgets to your AMP mobile site such as Like boxes for Facebook or smart email opt-in forms and other dynamic scripts. Despite these limitations, you will benefit from using AMP to improve and maintain your SEO if a significant chunk of your traffic comes from mobile searches.
At a recent marketing conference, Rudy Galfi, the Google AMP Project’s product manager, said that the median load time for AMP-coded pages is 0.7 seconds. In comparison, the median load time for non-AMP pages is 22 seconds. But fast page load times isn’t the only thing that you’ll get by using AMP.
Content that complies with Google AMP standards also gets special consideration in Google’s mobile search results. In mobile search results, AMP pages feature an AMP icon that looks like a thunderbolt and are tagged with the acronym "AMP."
2. What Websites Can You Use AMP With?
Initially, AMP focused on making it easier for users to read news stories from online publishers. However, you can now implement it on websites designed for other types of businesses - especially e-commerce sites, for which AMP results carousel and other components are best suited. By June 30 2016, Ebay announced that it had implemented its AMP-powered mobile shopping experience. This new ability to develop AMP-based product pages is a huge commercial incentive for WordPress websites (on which most ecommerce sites are based) to adopt the standard.
Once implemented on a website, there is no way to turn off Google AMP. If you visit an AMP-enabled website via Google search, you will always be taken to the AMP version. To visit the main sites instead of this Google hosted copy, you can simply request the desktop site through your mobile phone’s browser. Google serves the AMP version only for the first page you visit via Google search; you can navigate to the non-AMP version by clicking on any link on the webpage.
3. How to Add Google AMP to Your WordPress Site
There are two plugins you have to install on your WordPress site in order to run and customize AMP.
- The first is the main AMP plugin for WordPress, which was developed by Automattic. This plugin requires zero customization; you only need to install it.
- The second one is the AMP for WP plugin that adds advanced functionality to your AMP pages.
1. How to Google AMP Your WP Site: Installing the Main AMP Plugin
While you can find the official AMP plugin by searching the WordPress plugin store, you can only download the latest version at the project’s Github site. Installing the plugin through WordPress is the easiest. You simply have to follow these three steps:
- Search for amp-wp in the "Add New" Section of your Plugins WordPress admin panel
- Click install.
- Activate the plugin to start using AMP on your website.
If, for any reason, you need to use the most up-to-date version of the plugin, you will have to download the Github package and install the plugin manually. Here’s how to get it:
- Simply click "Upload Plugin" while on your “Add New” section of your plugin panel. (Just search for the zip file containing the AMP package then let WordPress take things from there.)
- Wait until WordPress uploads the file successfully.
- Activate the plugin and begin using it!
2. Configuring Your Site to Use AMP-Basic Plugin
Basically, you are done once you activate the base AMP plugin. You create content as you would normally do, and the plugin will take care of the rest. Take note though, features such as your site’s Google Analytics code won’t start working on your AMP pages out of the box.
3. Installing AMP for WP Plugin to Add Advanced Functionality to Your AMP Content
To add a heap of new functionality/configuration options to your AMP content, you will have to install the AMP for WP plugin. It works in conjunction with the base plugin, which means that you have to ensure that the base plugin is properly installed and activated before you can start using this plugin.
Among other things, AMP for WP plugin gives you the ability to:
- Add AdSense ads to your AMP content
- Configure how your AMP content looks
- Enable AMP for entire pages (the base plugin limits this to posts)
- Add social share buttons to your AMP content.
Simply install and activate the plugin to get started. Since you already have the base AMP plugin installed, your sidebar should have a new tab titled AMP.
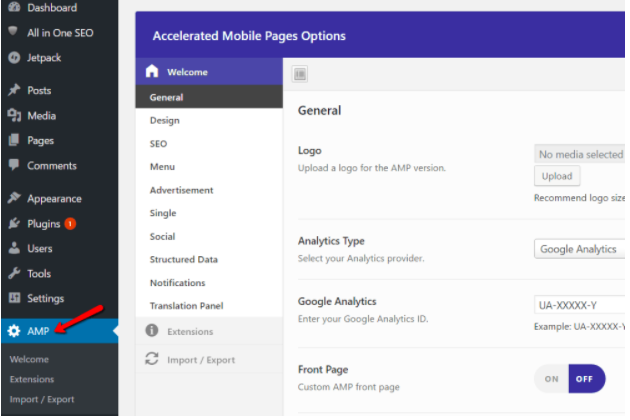
Hover your mouse over the AMP menu items and select welcome.
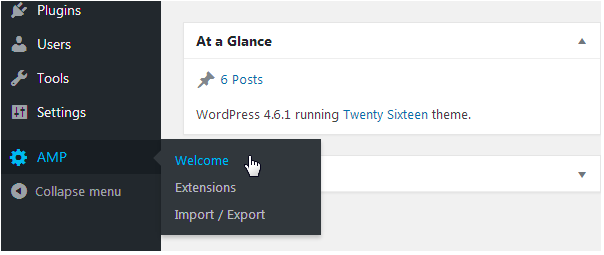
Next, click over the General tab. Normally, the default logo on the AMP version of your site is a simple text link, but you can also upload a custom logo. The developers of the AMP for WP plugin recommend an image of dimensions 190 x 36 pixels. Simply click the "Upload" button to add it.
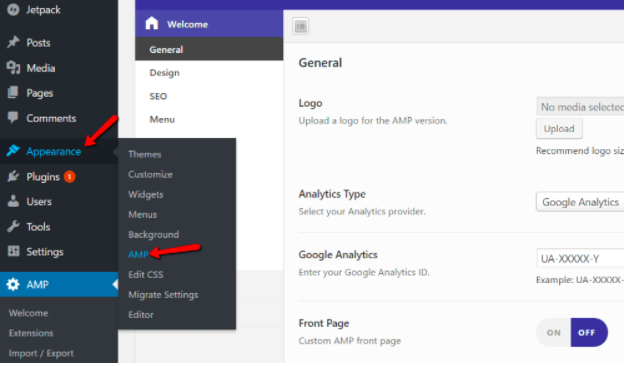 If you use any analytics service, simply select then enter your Analytics ID. AMP for WP currently supports Piwik Analytics, Segment Analytics and Google Analytics.
You can also change the color scheme of the AMP version of your site from the AMP for WP dashboard. However, these settings also let you do some more interesting things. For instance, if you intend on setting a specific page as the homepage of you AMP-enabled site, simply turn to this setting, then select the desired page.

Next, the developers of the AMP for WP plugin recognize the fact that some users may not like the look or feel of the AMP-enabled pages. The plugin provides a setting that allows you to insert a link to the original article in the footer. By default, this plugin comes with this feature set to ON and it's recommended that you leave it so to make things easy for users who do not like using AMP pages. The feature also offers an ON/OFF setting for RTL support for websites that use right-left languages such as Arabic, in addition to the archive pages setting that lets you enable or disable AMP on those pages.
How to Add a Custom Menu:
Compared to the basic AMP plugin, AMP for WP is a fairly significant upgrade. Here is what a typical AMP-enabled page looks like with the AMP for WP plugin activated:

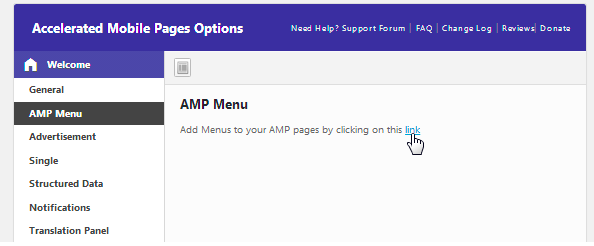
The top of the page features a navigation button that releases a slide-in menu to the right when activated. The bottom features a floating social share bar. You can edit the menu that displays on your AMP-enabled pages by going to AMP > Welcome > AMP Menu, then click the link. You will find there to navigate to the ordinary WordPress menu builder.
How to Add Advertisements
To add advertisements to your AMP pages, simply navigate to the Advertisement tab.
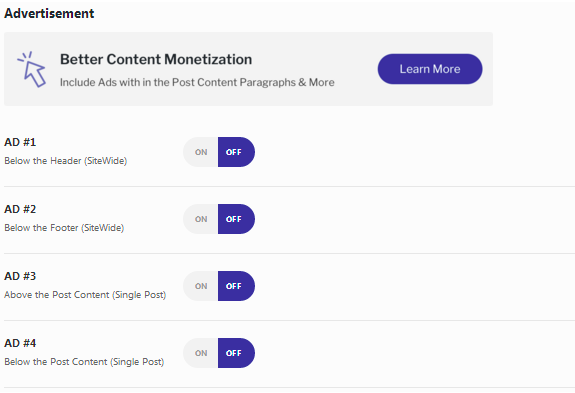
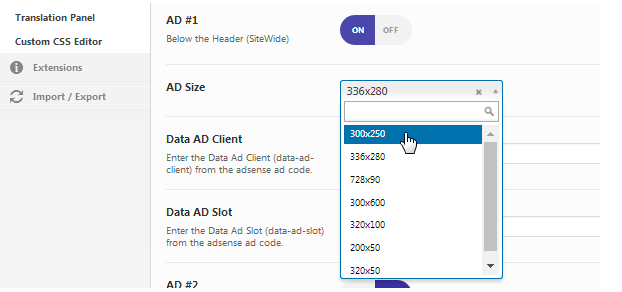
Next, toggle the ON/OFF switch for the ad you wish to enable, and then select size
After this, enter the Ad’s Data AD Slot and Data AD Client
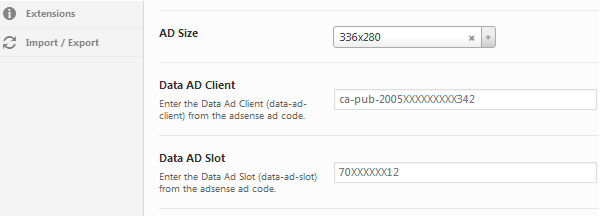
If you use AdSense, ensure that the Ad you select is the same size as the one you first chose. Otherwise, create a new one. Click on the Ad’s associated Get Code button to find out its Data AD Slot and AD Client. Finish by Clicking on "Save Changed to insert your Ad on the AMP-enabled pages.
How to Customize Settings for Single Posts
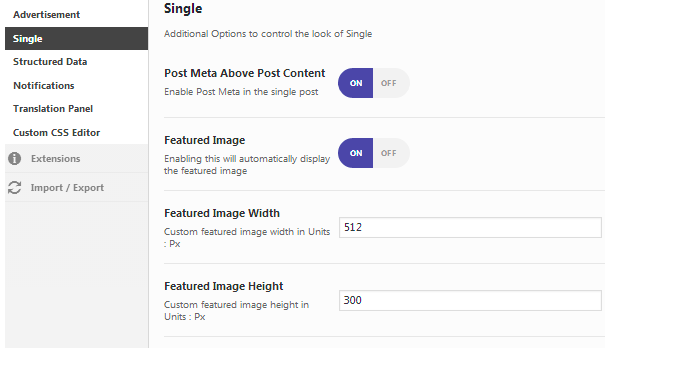
When you first activate the AMP for WP plugin and view your AMP-enabled blog posts, you will notice that all of them feature an image at the top of their pages in addition to a floating Social Share bar at the bottom. These are default features that you can turn off or edit in the "Single" section.
The first part of this section deals with the metadata and any featured images in the post. By default, the metadata, which consist of the author and date, are displayed at the top of each post. You can turn this off if you don’t want the plugin to display it. The section also allows you to toggle the featured image ON/OFF, or simply leave it on then enter its custom dimensions.
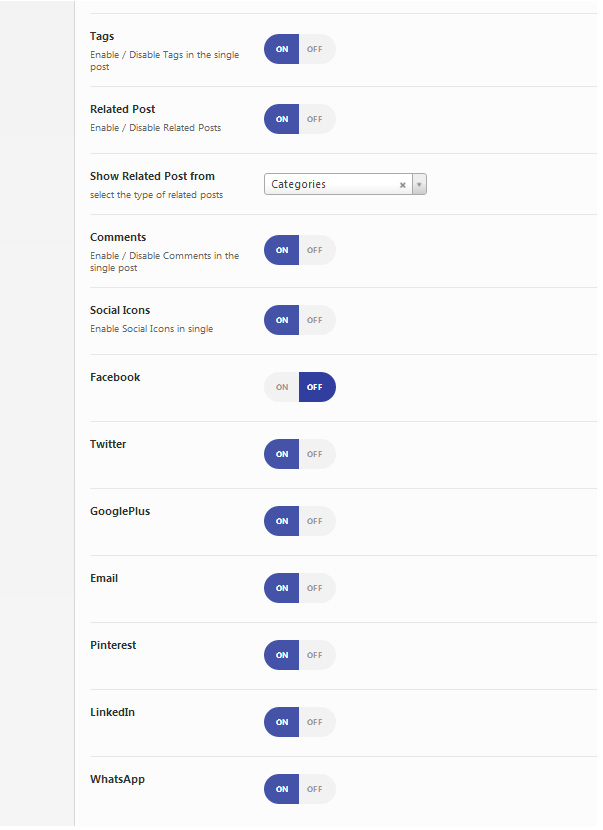
You can choose whether you want tags or related posts to display, in addition to selecting the specific social media platforms you want to appear on your Social Share bar.
How to Customize Structured Data
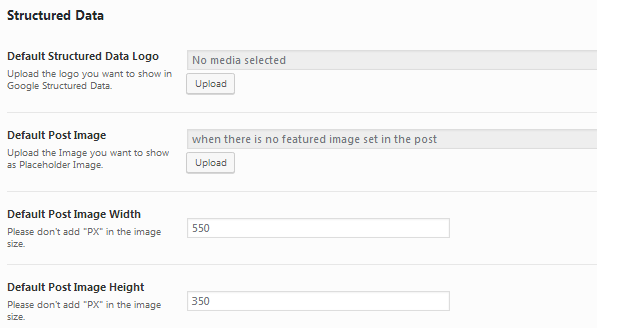
The plugin has a structured data section that lets you add the default featured image for your posts. A number of publishers, most notably YOAST SEO’s Joost de Valk noticed some errors in the search consoles of AMP-enabled pages and found out that they were caused by the lack of featured images on older posts. They cleared up most of these errors by adding default featured images for posts.
You can do this by navigating to the structured Data menu section, then click "Upload" and select a default features image of your choice.
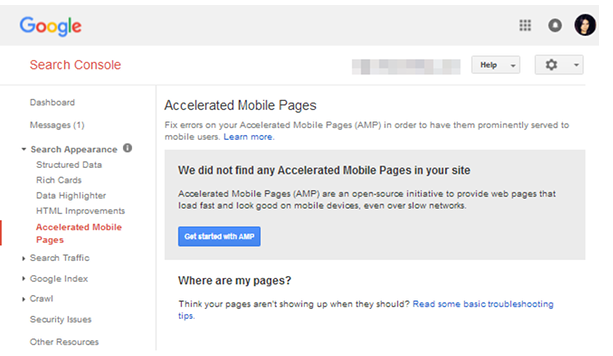
You can monitor your site’s AMP-enabled pages for errors by opening Search Console, then going to Search Appearance and clicking on Accelerated Mobile Pages:
SEO Plugins You Can Use With AMP
By default, AMP pages do not offer any SEO benefits, which means that you will have to add new AMP-compatible SEO plugins. Fortunately, virtually all SEO plugin developers have AMP extensions you can use for this purpose. You will however, have to download and install them separately, but you should first ensure that all your pages are structured in a way that improves your website’s overall SEO.
As of now, the most reliable SEO WordPress plugin that have released AMP updates or extensions are:
- WP SEO Structured Data Schema – This is an AMP compatible SEO Schema plugin developed by Kansas City SEO
- Glue for YOAST SEO – this plugin adds support for AMP to the Yoast WordPress SEO Plugin
- Schema App Structured Data – an SEO Schema plugin with AMP support. Downloadable from Schema.org.
Wrapping up: Should you do it?
Google AMP pages certainly look interesting thanks to the fact that they load 4 times faster than standard web pages. Moreover, any AMP enabled pages that happen to make it to the carousel for any given query are likely to rank higher leading to higher click-through rates. Superior speed, higher rankings - everything you would like your site to have. However while this is a big advantage for news publishing sites and content producers who create lots of new content on a all basis, Google AMP has very little effect on the success of non-publisher sites. For instance, since the project doesn’t support forms, you will have to kiss this top lead generation tool goodbye if you run an eCommerce site.
But if this doesn’t affect your revenue, the nifty browsing experience AMP offer will make for happier site visitors – and get you that unique AMP designate in mobile search results.